Written Step-by-Step Instructions (click on image thumbnails to view full size)
Associating new bike shop products
-

Step 1.1
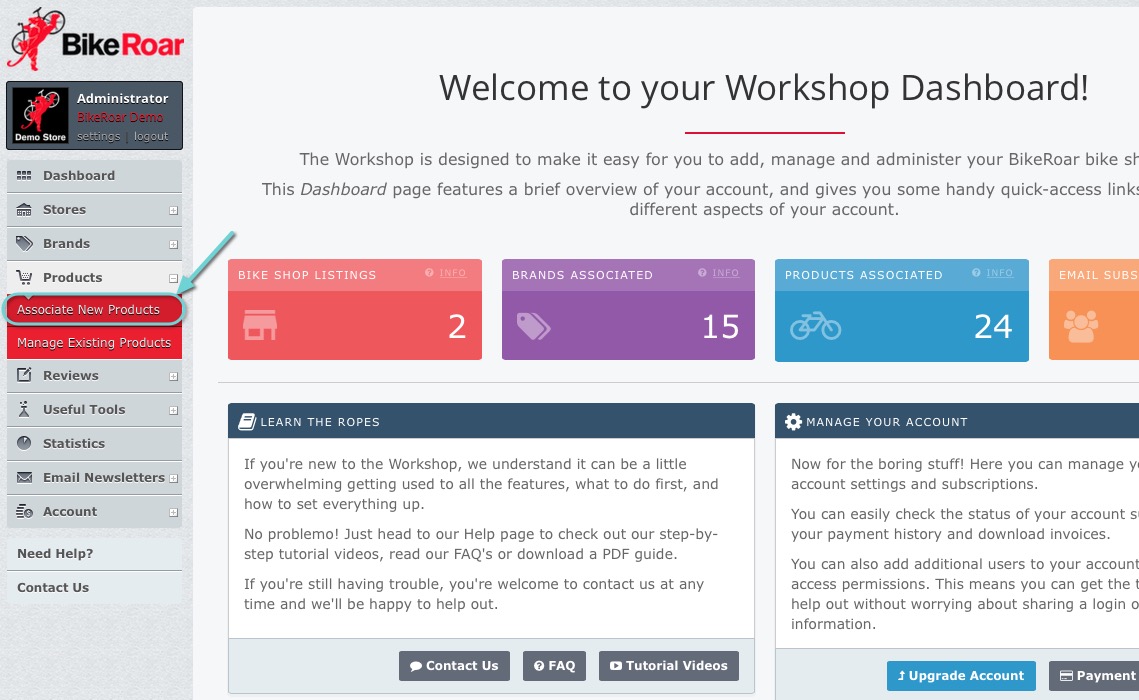
In your BikeRoar Workshop, click on “Products” and then “Associate New Products” in the navigation menu (or just click here).
-
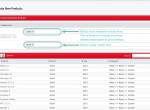
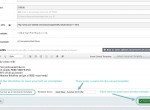
Step 1.2
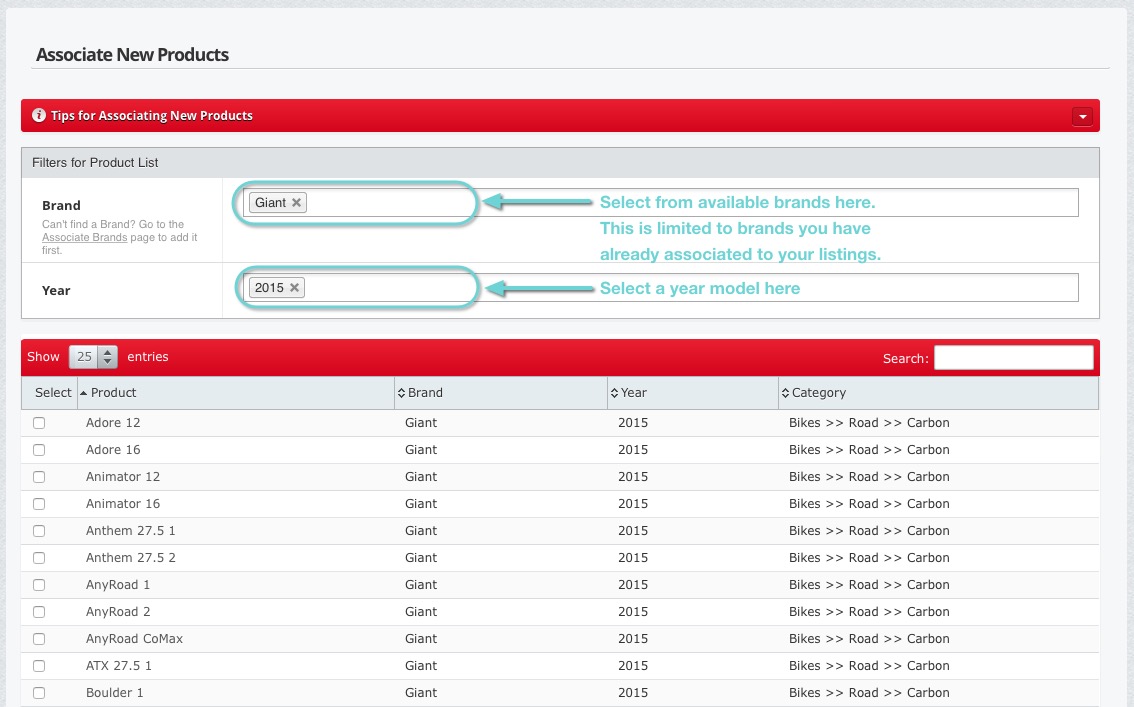
Enter in a brand and year model to narrow down the list of available products.
Note that the options for brands are limited to brands that you have associated to your stores already. If you haven’t done this yet, click here to find out how.
-
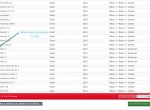
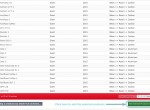
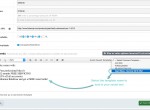
Step 1.3
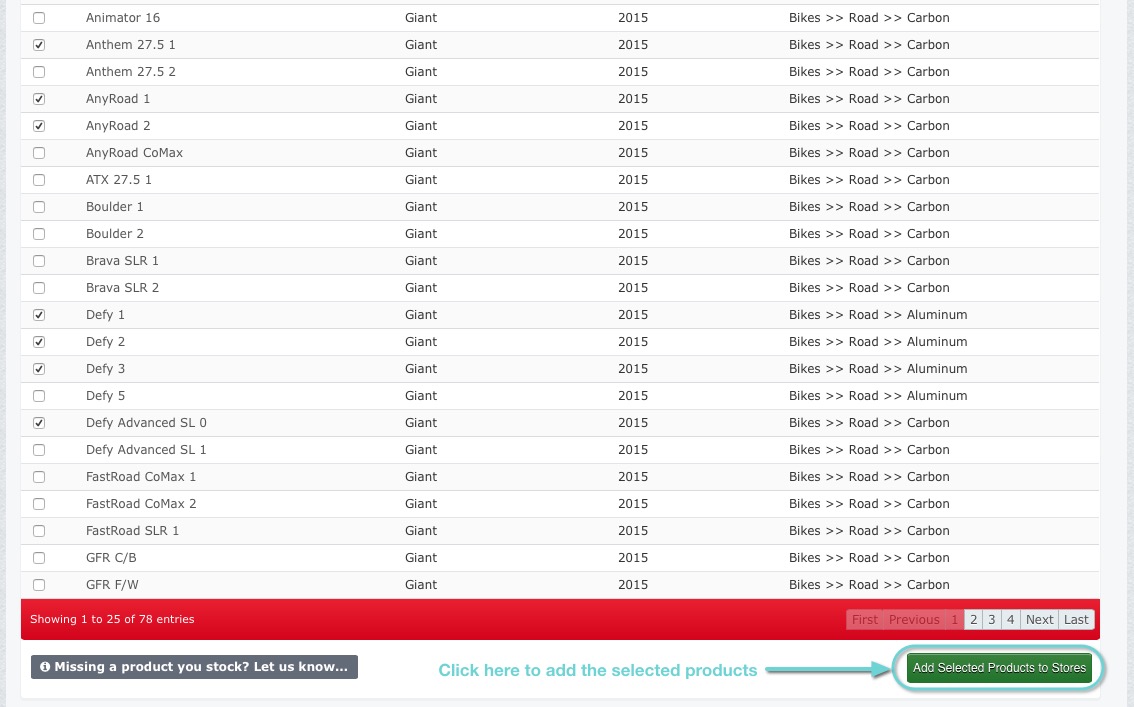
Tick the checkboxes next to each of the products you wish to add.
-
Step 1.4
Click on the “Add Selected Products to Stores” button.
-
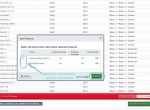
Step 1.5
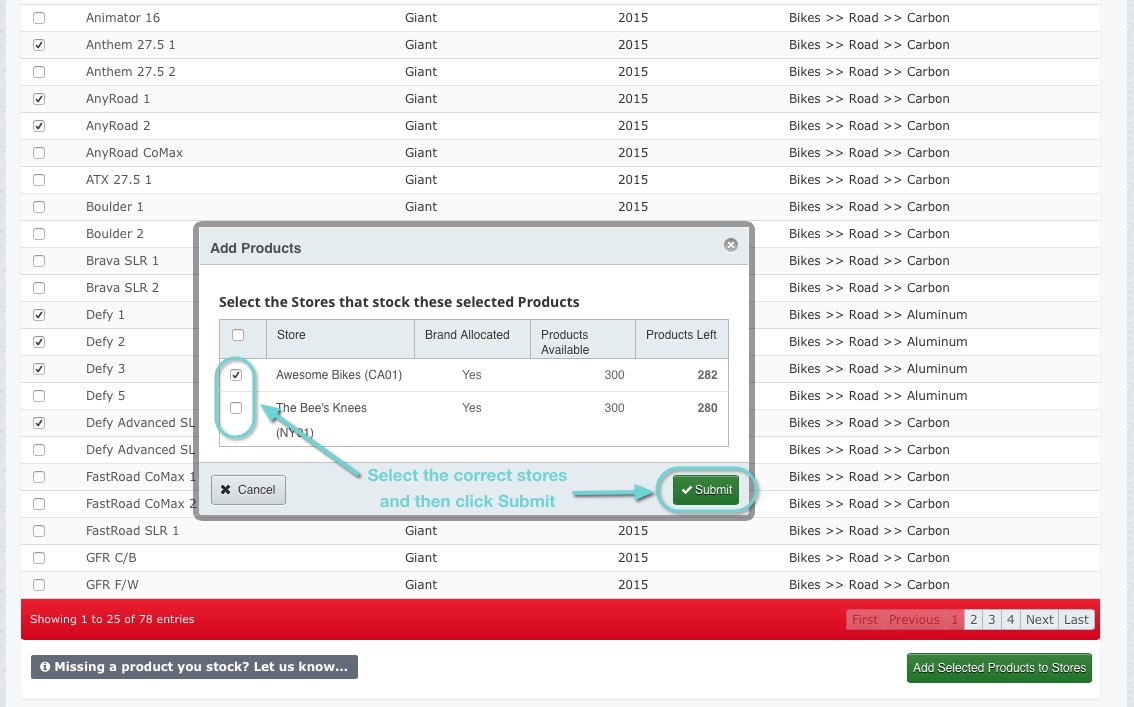
Select which of your Stores stock these products and then click “Submit”.
Once you’ve finished adding products, it’s important to make sure you add your availability and pricing. See the next section for details.

Editing your product availability and offers
-

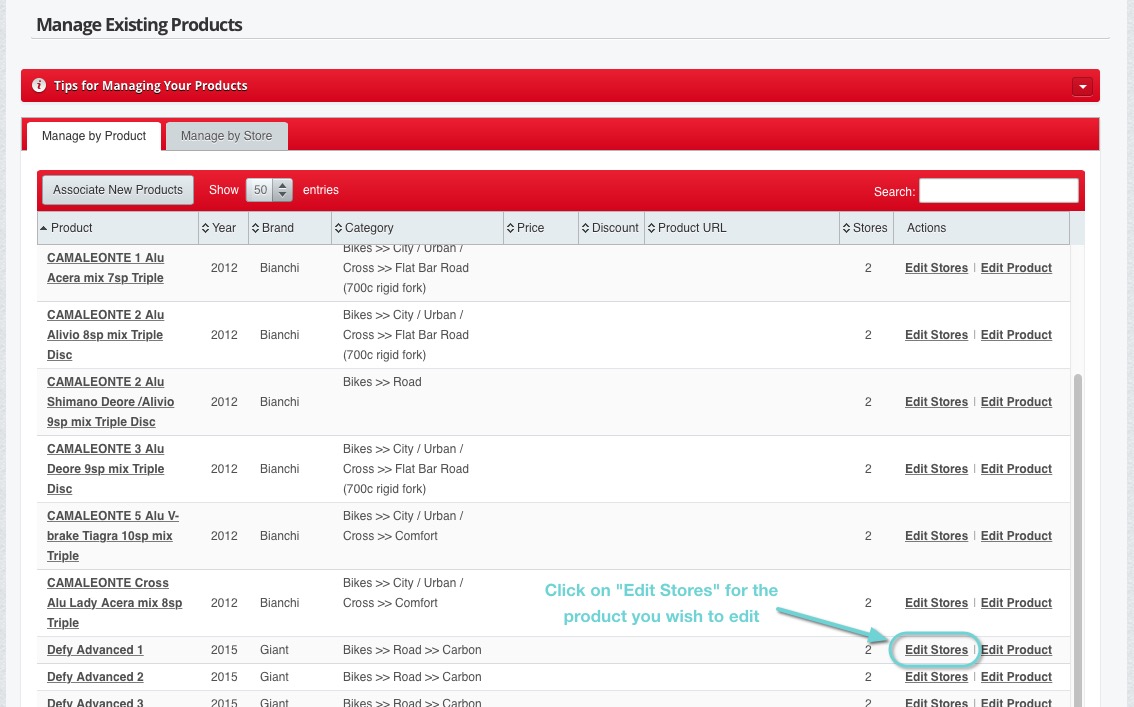
Step 2.1
To manage your existing products, click on “Products” and then “Manage Existing Products” in the navigation menu (or just click here).
-
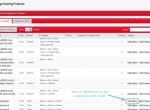
Step 2.2
Now, click on the “Edit Product” link for one of the products.
-
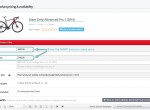
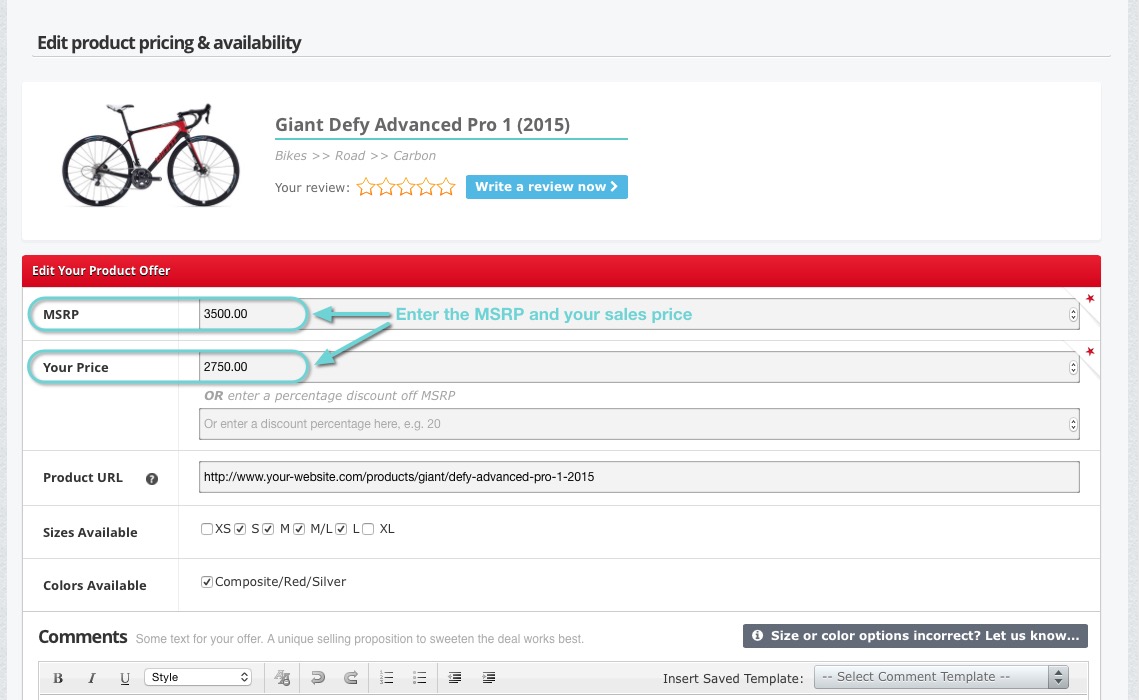
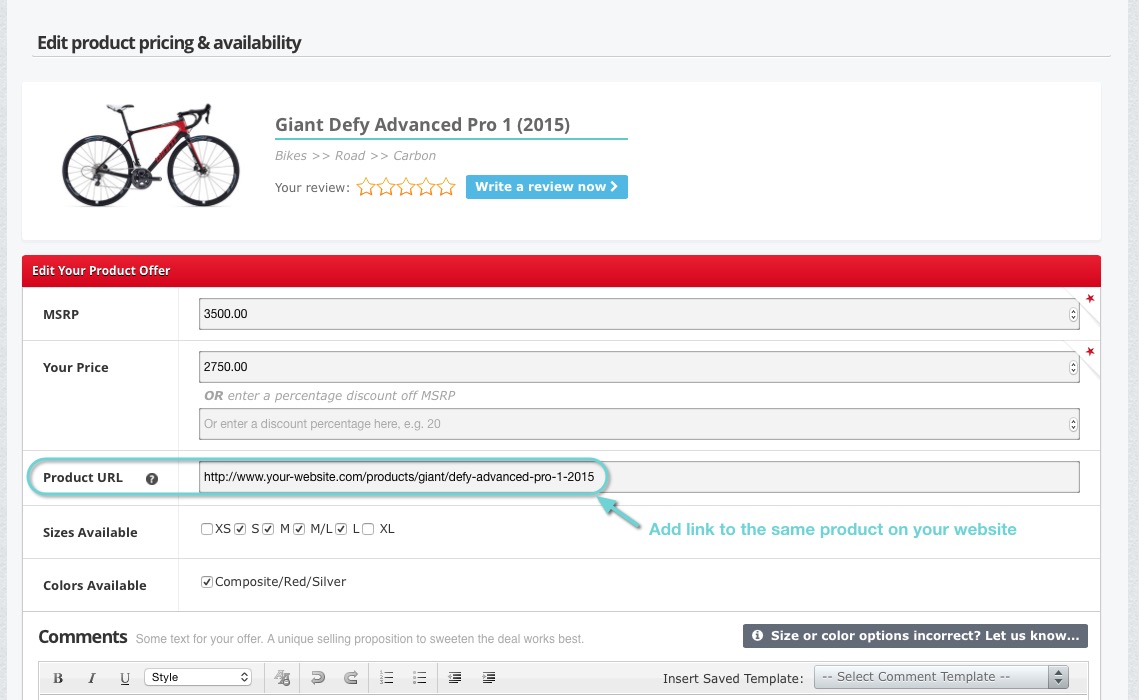
Step 2.3
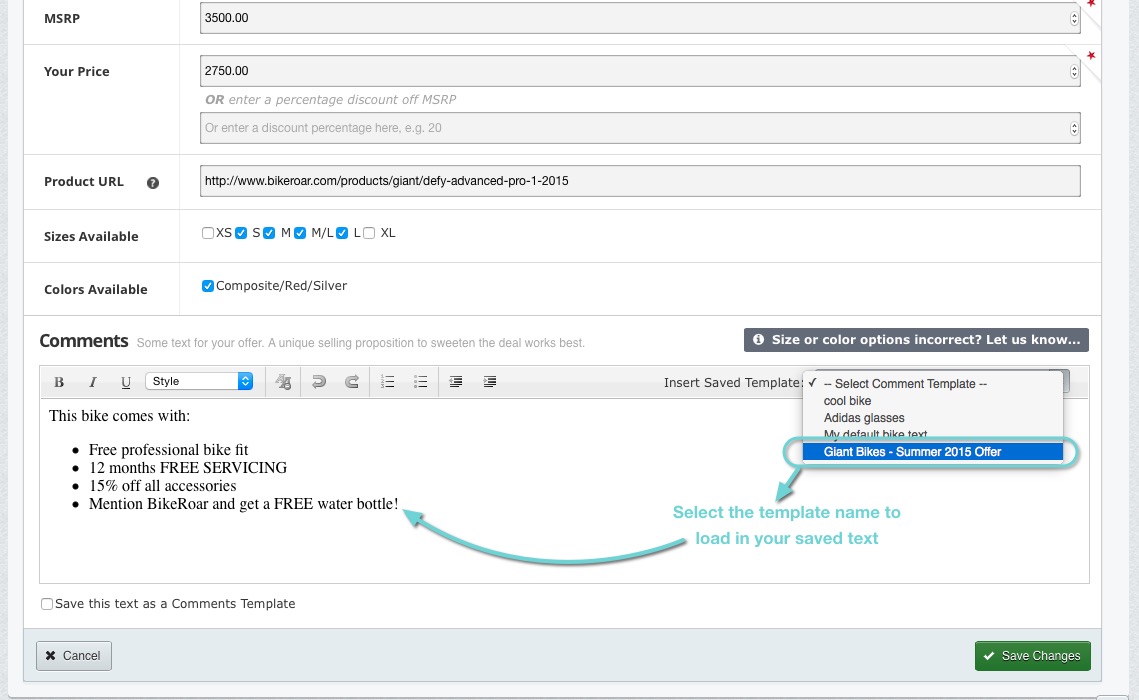
Then, enter in your MSRP and Sale Price. There’s no need to add currency symbols, just the number.
Once you enter your Sale Price, the discount percentage will update automatically.
You can also do this the other way round if you want, by entering an MSRP and discount percentage. The Sale Price will then be automatically updated with that discount applied.
-
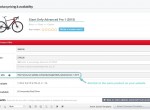
Step 2.4
If you are on a plan that supports it, you can also add a link to the product on your own website if you have one.
This is ideal if you have an e-commerce site, as you can link directly from BikeRoar to the page for that product on your own site.
-

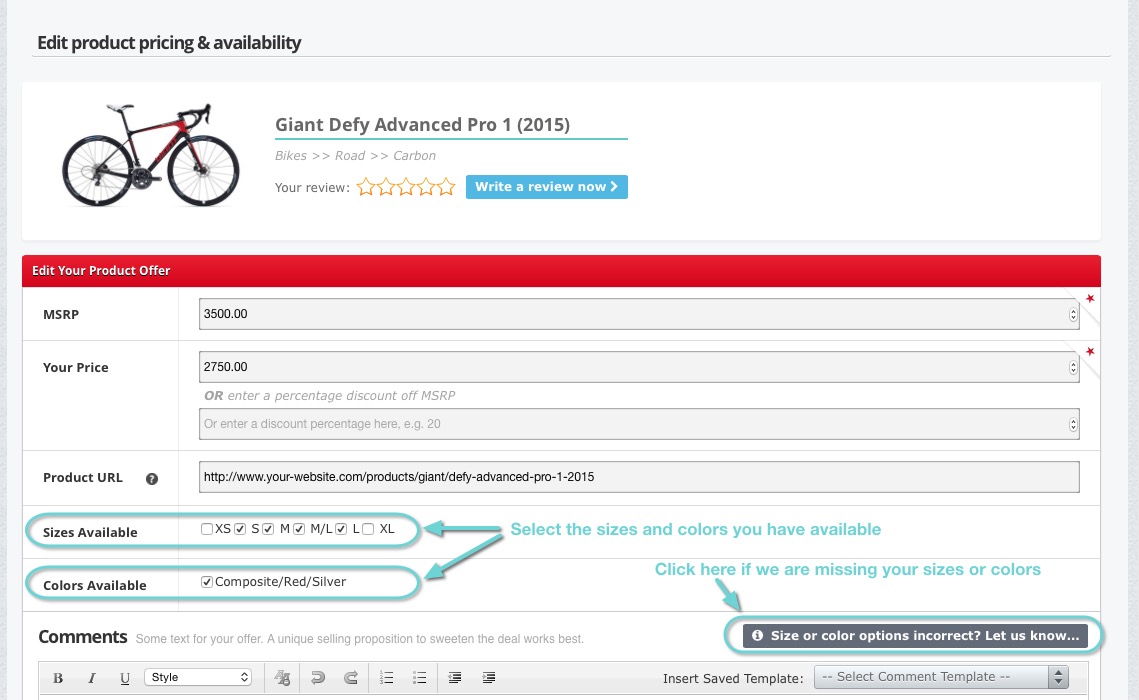
Step 2.5
Then, select which sizes and colors you have in stock for that product.
We’ve pre-populated the options for each product for you, but if we don’t have the options you need, just click on the grey button to let us know and we’ll be sure to add it for you.
-
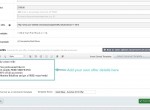
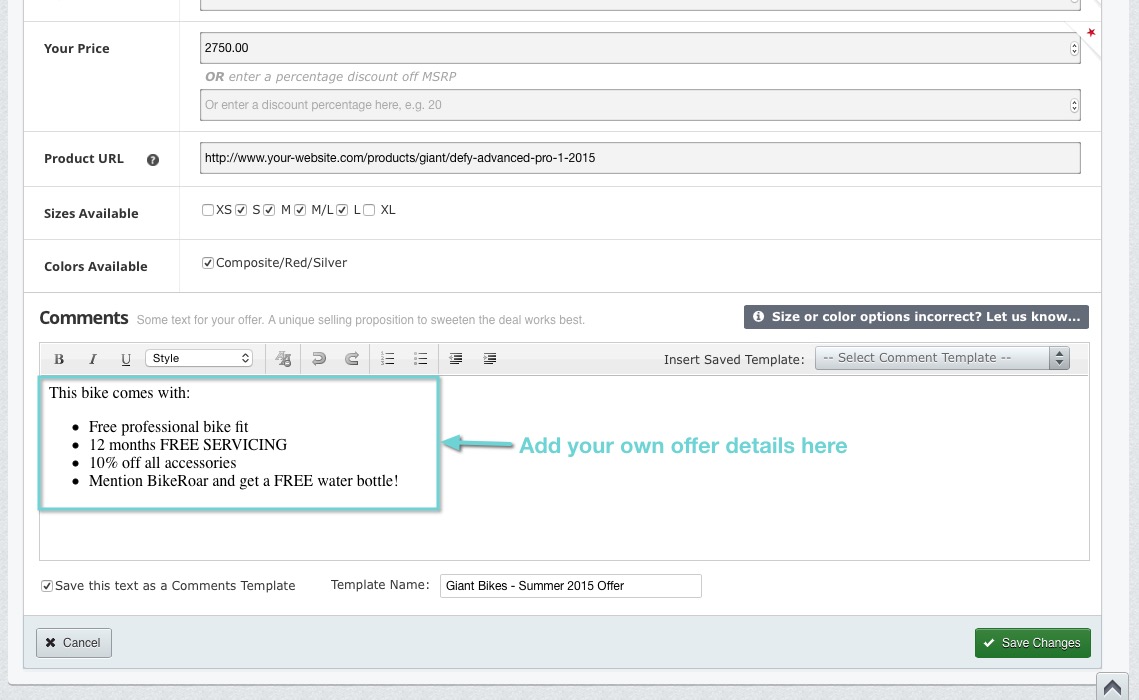
Step 2.6
The final step is to add a unique sales proposition (USP) to the ‘Comments’ section to let the visitor know about any add-ons, discounts or services you are offering.
This increases conversions and helps to differentiate on areas other than just pricing.
Here’s an example of some things that may be appropriate:
This bike comes with:
– Free professional bike fit
– 12 months free servicing
– 10% off all accessories purchased with this bike
– Mention BikeRoar and get a FREE water bottle! -
Step 2.7
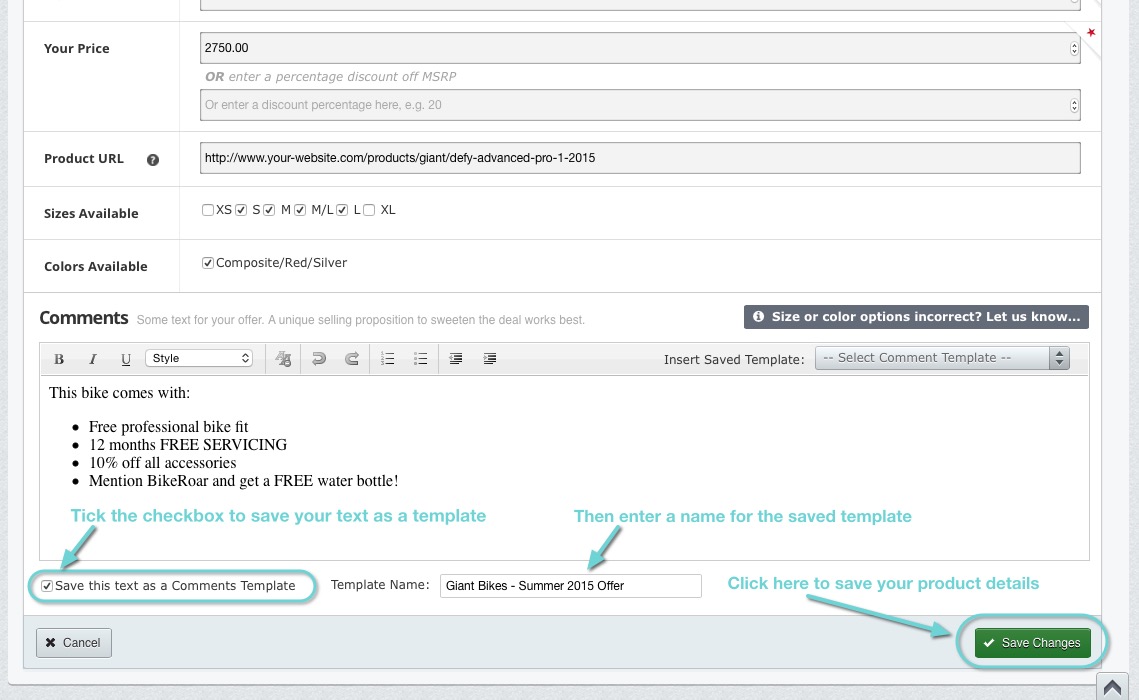
To save time, you can also save your comments text as a template to use for your other products. This is a big time-saver for when you have the same offer for all products of a certain type or brand.
To do this, just click the checkbox under the comments text and enter a name for it so you can find it later.
Then, click on “Save Changes” to save the details you’ve added to the product.
-
Step 2.8
When editing your next product, you can easily add your saved comment text by selecting the name of the template from the dropdown in the top-right of the ‘Comments’ section.

Editing the stores for existing products
-
Step 3.1
To manage your existing products, click on “Products” and then “Manage Existing Products” in the navigation menu (or just click here).
-
Step 3.2
If you need to edit the stores for a product, click on the “Edit Stores” link for that product, adjust as necessary and then click “Submit”.
-
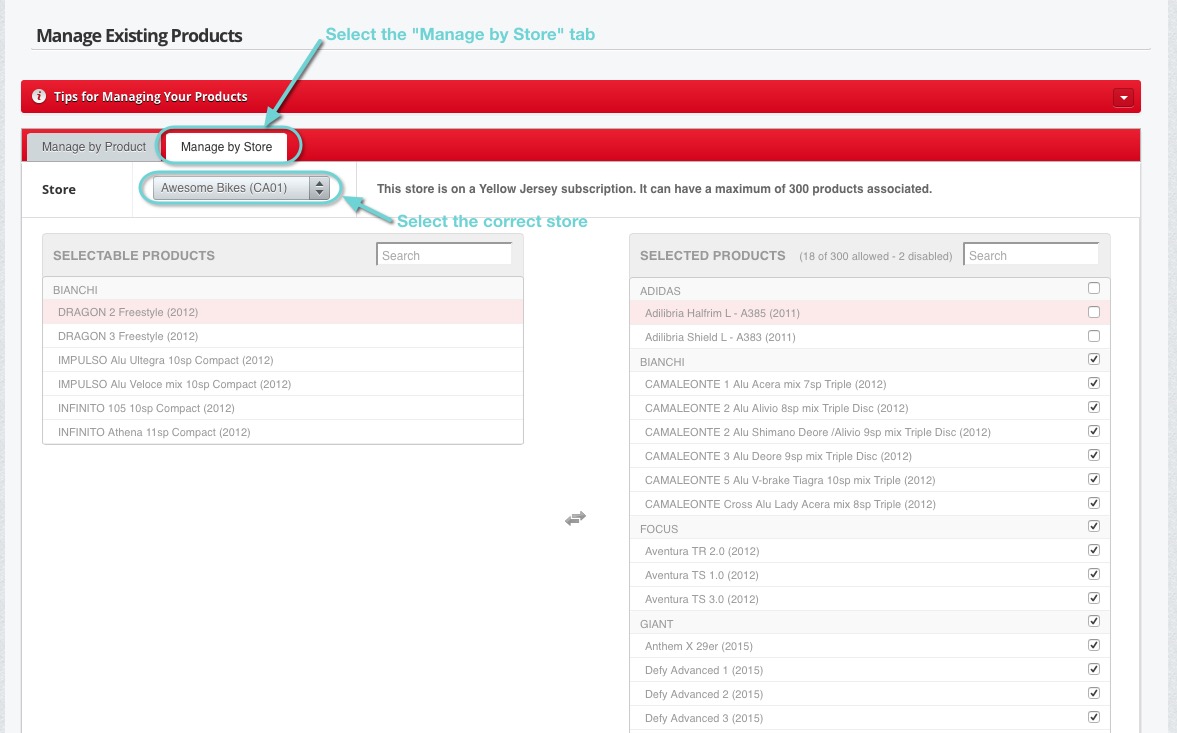
Step 3.3
You can also manage all the products associated to a store via the “Manage by Store” tab.
First, if you have multiple stores, select the appropriate store in the drop-down.
-
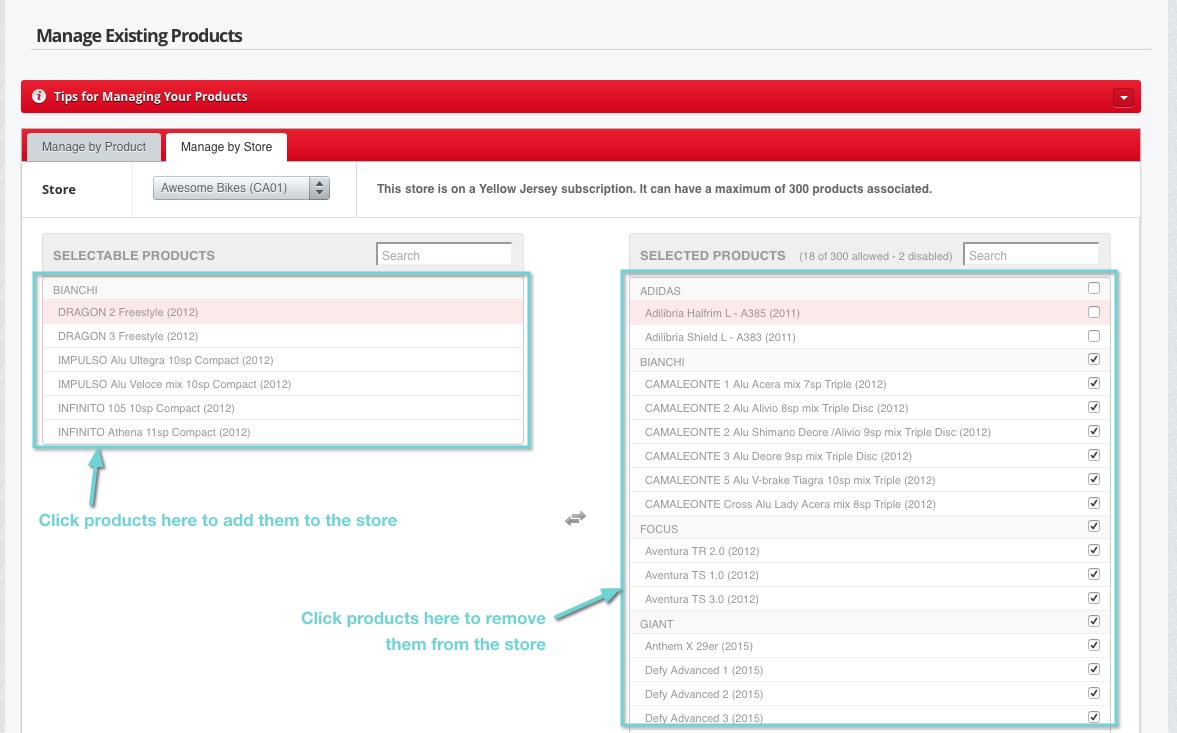
Step 3.4
Now, you can simply click on products in the right-hand column to remove them from the store, or, click on any products in the left-hand column to add them to the store.
-
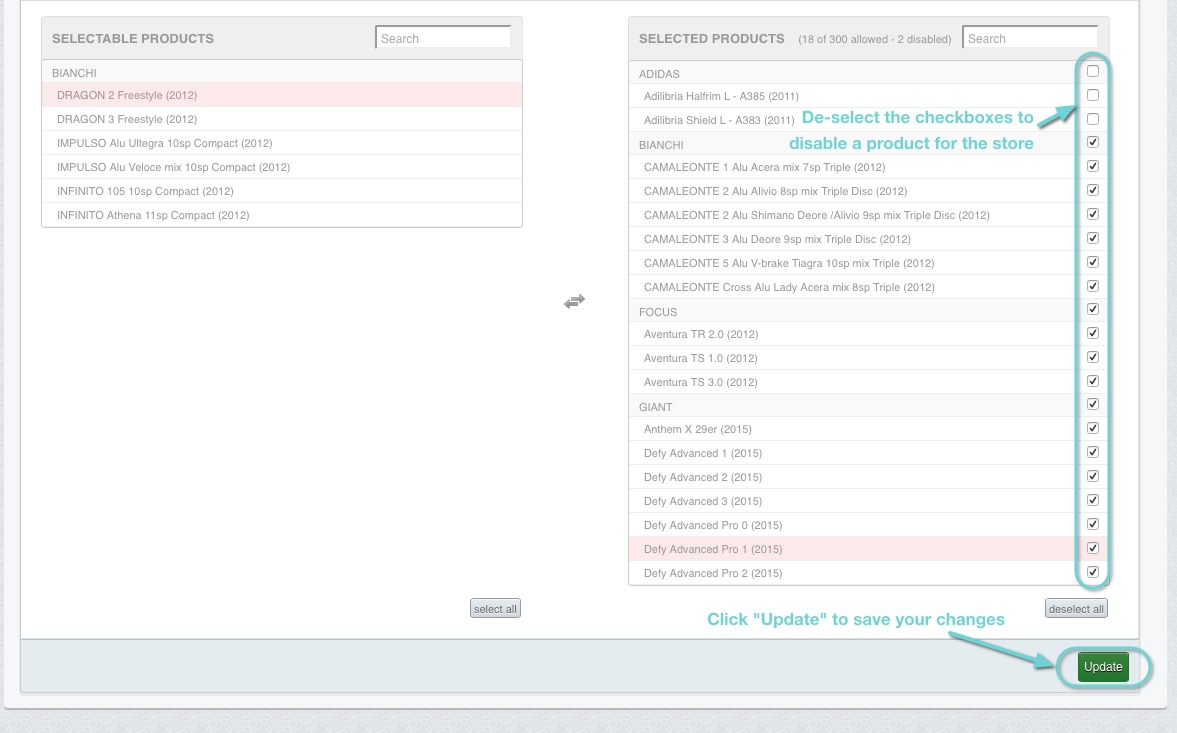
Step 3.5
If you wish to temporarily disable a product, you can do this by clicking the checkbox next to that product in the right-hand column.
This is especially useful if you have any products that is temporarily out of stock, as they can be very quickly re-enabled by clicking on the checkbox again.
Click “Update” to save your changes when you are done.
-
NOTE: If you are on a Premium or Trial plan that enables you to associate products, and then you downgrade back to a lower plan that doesn’t include any (or as many) product associations, you’ll notice that some or all of the products for you stores will be marked as disabled.
We do this so that when you upgrade to a higher plan again, your old product associations are preserved – they simply need to re-enabled if they are still valid.

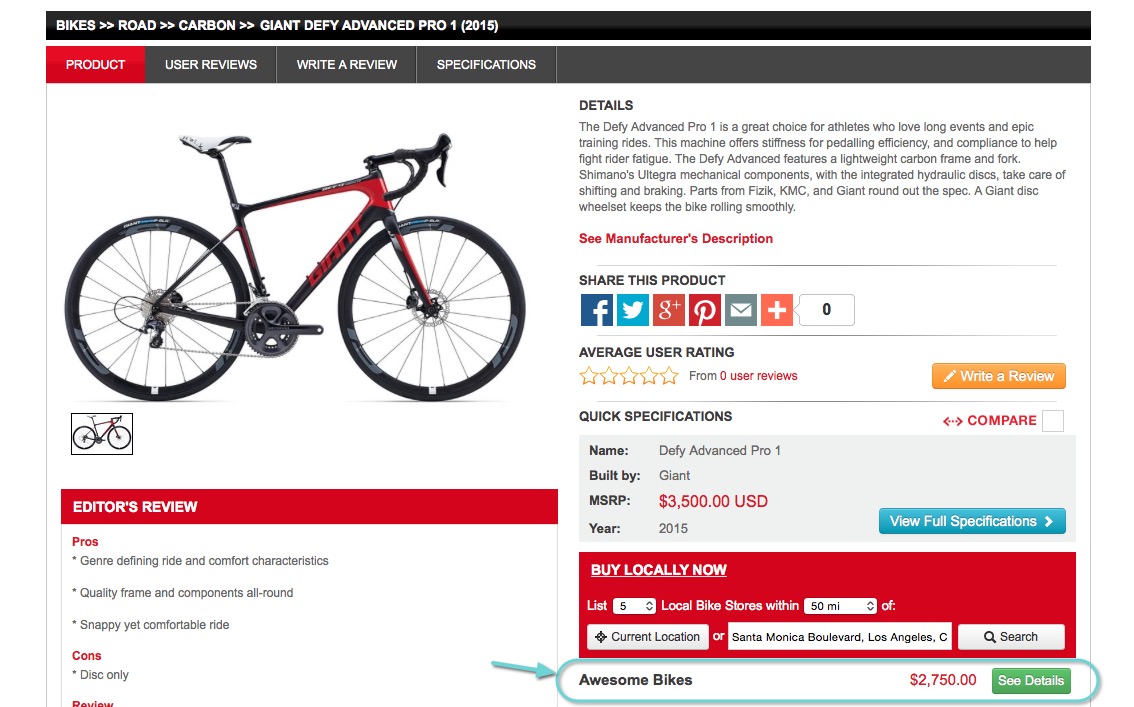
The results – 1
So what happens next?
Your store listings will now include all the products that you’ve associated.
Even better though, whenever a visitor from your local area views a product from one of those brands, your store will appear as a stockist.
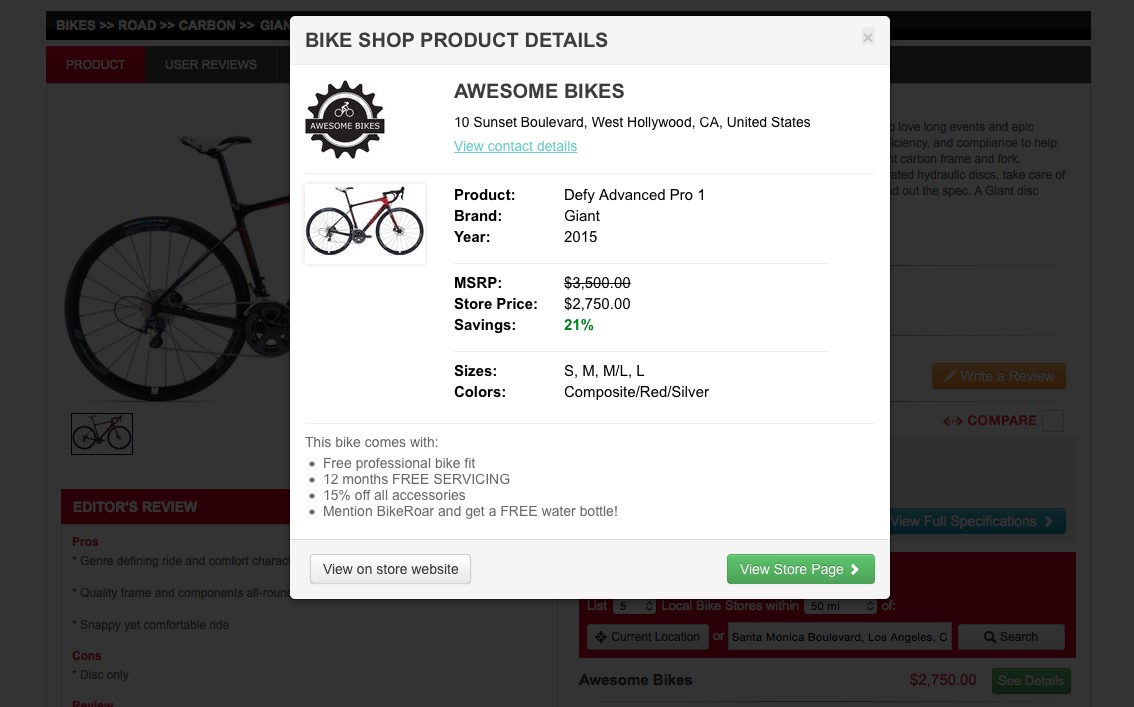
The results – 2
They can then click to see your store info, availability and offer details.
To get the best results from your BikeRoar listing, be sure to repeat this process for every product you have listed.